There are a million schemes for raised-bed gardens, and if you are going to put yours on an unleveled spot, it can be tricky. Pioneer Woman's is a good plan, but takes a lot of leveling of dirt. That's hard! And Hard Work! My garden bed plan was based on one I helped build for St. Clement's School, and the 4th graders grow some beautiful flowers and vegetables, and have learned so much about gardening. What you do is make a real....bed. With legs. you can level it easily by digging under the legs, not necessary to level the entire ground under it.
This plan is easy and only took myself and Cerebro Izquierdo 2 hours to put together, but that was using some power tools, a saw and a drill, to be specific. Here are some of the hand tools you will need.
I decided to use 2x12x10ft. boards. They were about $8 apiece. I also bought a 4x4 inch post which was also around $8.00. The Square Foot Gardener says that you only need to use 6 inches of soil, so you could use 1x6's. Also, using 10x10 is going to cost me about $100 to have filled with a soil compost mix from a local materials outfit. You figure 27 square feet in a square yard of soil, and since I don't want to fill it to the top, and I'm going to amend the soil some, I need 2 yards. All together this garden is going to cost me around $200.00. However, it will be moveable if I need to, and it's very large. That's a ton of vegetables, and over the years....what's that word? Amortize?
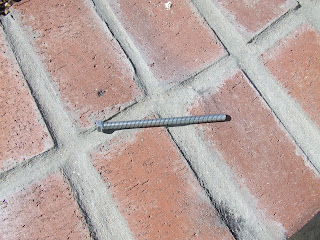
You will need 16 bolts, like this, 3/8x6,
and washers and nuts to tighten them up.
I realized that if I set the boards up on the posts with some space underneath like a real bed, we could easily dig holes under the posts to get the top level, which is what we did. We cut the 4x4in. posts to 18 inch lengths, giving ourselves a 6 inch leg to use when leveling. If your space is not as sloped as mine was, you could leave less space on the "legs".
I made two templates with drill marks spaced so the bolts wouldn't hit each other.
We marked the posts with the templates like this, and then used the drill to make a 3/8 (the same size as the bolt) hole through the post.
We then set up the boards and posts on the ground and held the boards to the posts and used the drill to mark where to drill on the board. Then we drilled holes in the boards and used the bolts to connect the pieces. Voila!! Then we used the level to check which sides were uneven and dug underneath the high posts until the level was happy.
I decided I didn't need the bottom of the boards to touch the ground, and I'm using some left over vinyl flooring that I used for the chicken coop to close the larger openings, but I'm not sure I even needed it.
Now for the dirt, the peat moss, and the vermiculite. Hmmmm. Seeds or plants?


No comments:
Post a Comment