Showing posts with label chile. Show all posts

Thursday, February 17, 2011

Baked Chiles from Seasoned with Sun

This is an oldie-but-goody recipe and a fine side-dish to serve with beef. My mother  liked to serve it for "company" dinners, but it only takes about 15 minutes to put together, and if you've got this, a steak and a salad, you're set.
You will need :
Original recipe from Seasoned with Sun
1 or 2 chiles for every person.

1 egg for every two or three chiles.
A can or two of stewed tomatoes
*Stewed tomatoes are peeled and cooked just a little with  celery and bell pepper.  Plain stewed tomatoes are very common in southern food.
Sometimes they are also Mexican style or Italian style.  For this I like the plain Stewed.

Monterrey Jack (or cheddar, colby or longhorn) cheese.  I found a blend of cheeses in my refrigerator, but I prefer just Monterrey Jack.

An onion.

Butter.  Forget about "margarine".

And( this is my own addition) about a tablespoon of flour.
Here are the steps:

1. Grease an oven proof dish.


2. Stuff the chiles with cheese.


3. Lay the stuffed chiles in the dish with a little space between them.  Let the stems climb up the sides.

4. Chop the onion and saute it in butter (or ok, olive oil) until it's translucent.


5. Add the can of stewed tomatoes (and a pinch of sugar) and saute a few minutes.
6. Pour it over the chiles.


7. Separate the eggs.

8. Whip the whites.
9. Then add a tablespoon of flour to  the yolks with a teaspoon of water and good pinch of salt.  Mix well.


10. Fold the whites in with the yolks.

11. Spread this over the chile/tomato mixture.


12. Bake about 30 minutes in a 350° oven.  I don't know why the recipe in SwS says 45(to 60!) minutes, that's just wrong.

This is definitely good enough for "company", or just your favorite people!

Wednesday, November 3, 2010

Chile Verde

There are a ka-jillion variations for Chile Verde con Carne, or green chile with meat.  Some call for tomatillo, some for tomato, some for potato, some have lots of spices. Some are for beef, some for pork.  Everybody has one, as they say.  Including my Dad.

Dad makes himself a big pot every week or so in the retirement apartment where he lives.  He then eats it several times during the week  for lunch.  He never gets tired of it, and although I wish he ate more vegetables, it's a healthy, low fat meal.
His recipe is:  chile, round steak cut into pieces, potato, and onion.  Sometimes garlic, sometimes not.  Water with beef bullion cube. Salt and pepper.  He cooks it a long time on low.  That's it.  He doesn't brown the meat or the vegetables and he uses only round steak.   He learned from a butcher that a local Mexican restaurant always used round steak, because the cooked meat held together and didn't disintegrate into vague beef-ish stuff.   His weekly batch definitely needs to hold up.

I use round steak as well, but sometimes I'll cut up a tri-tip or a chuck roast because I like the flavor.  You could certainly use "Stew Meat". 


Personally, I like Chile Verde that doesn't have potato.
Here is how I like to make mine:
You will need;

(for 6 servings)

2 1/2 lbs. of trimmed round steak.
seasoning (I like Great American Steak Seasoning) and flour
6 (minimum) green chiles, peeled and seeded.
1 small can of tomato sauce
1 large onion
2 cloves of garlic
oregano
1 bottle or can of beer or 2 cups  of water.
Cooking oil for browning the meat and vegetables.
1.Season the meat with seasoning and flour lightly. Cut into bite sized pieces.
2. Heat up a heavy dutch oven and put a small amount of oil on the bottom. ( I use peanut oil for browning)
3. In batches, brown the meat well.  Remove from the dutch oven. 


4. Cook the chopped onion, garlic and chile and 1/2 tsp. oregano until it's slightly browned.


5. Return the meat to the pan.
6. Add the can of tomato sauce and the water or beer.
7. Cover and put into a 300° oven.


 8. Check after 2 hours for tenderness and add liquid if you need to. You can cook this all day if you want to.


Serve with flour tortillas.

Tuesday, July 6, 2010

Chiles Rellenos

Chile relleno means "re-filled" chile.   Llenar (yehnahr) is to fill, and chiles rellenos are chiles that are filled or "stuffed"  in many different ways. Rellenos Frios are not fried but served cold, stuffed with with guacamole or shrimp, chicken, or tuna salad.   Chiles en Nogado are stuffed with a meat/fruit/nut mixture, traditionally served for holidays.  Where I live on the Texas, New Mexico, Mexico border, the  "Chile Relleno" dish  is a thick-meated green chile,  roasted and peeled, and usually, but not always de-seeded, stuffed with cheese and coated with simple batter made with eggs and flour.  Then fried carefully in a pan with a scant amount of oil; this is not a deep fried dish.  This Relleno is served warm, as a side dish or as a main course. 

My guys would rather have a steak with a chile relleno than a potato.  Any. Day.  Something about the blending of the flavors of green chile, Monterrey Jack cheese, crispy batter and a piece of delicious beef cooked perfectly over a hot grill.... well, it's just the about best combination ever invented.  The next best way to enjoy one is wrapped with a schmear  of refried beans in a freshly toasted flour tortilla.  That, my friend,  is a burrito that will bring tears of joy to a hungry person.

But, back to the Chile Relleno, simplicity and just the minimum of everyday ingredients once again trumps the overwrought and the over-thought. Steak, Chile Relleno, and maybe some sliced fresh tomato.... now that's what we consider a perfect summer meal.

As the daughter of a chile farmer, I always look for  green chile that is thick and meaty.  Rounder tips are generally, but not always, milder than the pointy ones.  I am very lucky to have a neighborhood store that always has freshly roasted chiles available.  And they are usually very good ones.  And.....someday I am going to find the sweet little man who roasts them so perfectly and give him a big ol' kiss.  Probably.

Anyway, you take your roasted and peeled chiles and make a small slit in the side and rinse out the seeds.  Then you dry them well and dredge them in a little bit of flour.
Cut the Monterrey Jack cheese into strips and stuff them into the chiles.

Now you take some eggs, say one for every 3 chiles that you are going to make, and separate the yolks from the whites.  Be careful!  You don't want any yolks to mix in with the whites or it won't beat up fluffy and white, like this.


I put some plain flour in a strainer, along with a generous pinch of salt and some baking powder ( a half tsp. per cup of flour).  How much flour, you ask?  Well, just guestimate about the same volume of flour as yolks.
Then shake your strainer over the yolks and mix the dry ingredients with them, and add a little water until it is thick but not stiff, about pancake batter consistency. 


Take  the yolk mixture and fold or whisk it into the beaten whites.  Don't over-mix it, just until the whites and the yolk mix  together.   Heat up a pan with about a half inch of light olive oil, or any other oil that you like.

Now, dip your chile into the batter, and lay it carefully in an ugly pan just like this one. 


Don't have one this bad?  No worries.  Just use what you have.  Your rellenos should fry but not sizzle and spit.  Turn them over when they are brown and fry the other side.  Then lay them on some paper or paper towels and keep them warm (200) until you're ready to serve them up.   If you are lucky enough to have some left over, be sure you try the chile relleno/refried bean burrito.  You will never be the same.

Sunday, November 22, 2009

Red Enchiladas, Part 1


This part really isn't very difficult at all.  It just takes some 'splainin'. Once you've done it once or twice it's really NBD and only takes about 15 minutes.    You just need to do this earlier in the day or at some earlier time because it's much easier to assemble your enchiladas when the sauce is cool.  Also,  red chile sauce freezes very well.

First, get a package of whole dried red chiles.  (I didn't leave out an "i", the word is chile, not chili, chily, chilies or any other gringo spelling).  And they don't have to be from Hatch, but definitely from New Mexico.
A word about chile.  My father,  Buck Sommerville, a renowned chile farmer and an innovator of the dehydrator and packaged red chile, always wanted to eat "fresh" red chile.  The taste is actually better.  So look for a package that has chile that is slightly soft and bendable, not crackly and breaking. Also, the color is slightly more red than brown with freshly packaged red chile.  But if you're desperate, any whole dried pods will do.  And a warning about ground up dried red chile "powder".  Don't do it.  You don't know what it is, how old it it, what bugs are in it,  how it was stored, etc.   It is the last resort of a chile lover.

I always get "MILD".  That's because farmers today have a hard time getting pure seed.  And if the seed isn't produced in a field that is  isolated from another field that is growing "HOT" you might burn up everything from your lips to your *.  So get mild.  You might get a hot batch anyway.
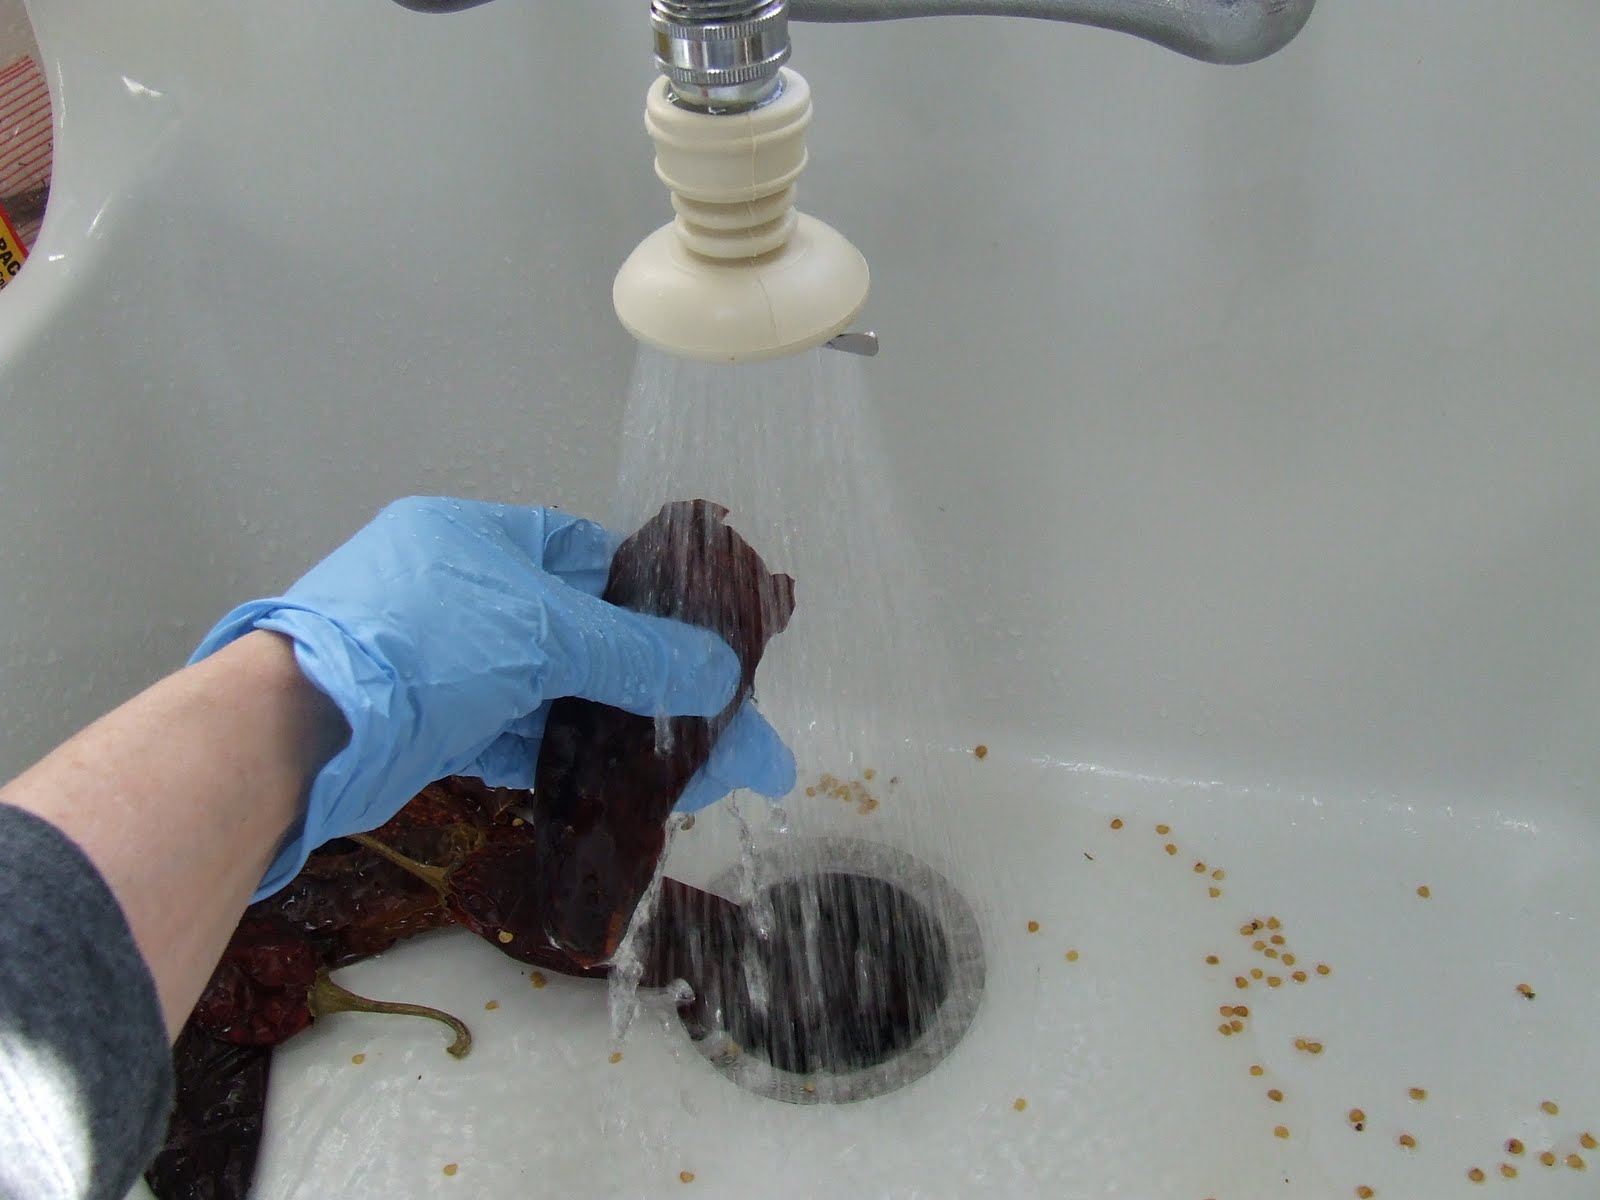
Put on some gloves.   Working with chile with bare hands can get your hands burning for much longer than you ever thought possible.  And if you slip up and touch your eye.... just put on some gloves.
Wash the chile and start breaking the stems off.  You don't really have to wash out the seeds but it might help make the finished product milder.  We like a little "pica" (bite) with our chile so I don't bother washing out the seeds...they will get strained out later.  Keep the water running over your work, the dust can bring on a coughing fit.

Then cover your chiles with water and on the stove top they go.
Some recipes call for just covering with boiling water, but I like to boil them, but only for about 5 minutes, covered.  Then let  them sit for a few more.
Get your blender and a dish towel.
 You'll see why in a minute.

Fish your chiles out of the pot and put them in the blender.  And here is where I put in some fresh Oregano.  Or you could use a pinch of dried.  Just thrown it into the blender with the chile. Use a strainer to pour some of the boil water in, just enough to cover well.

Then, put the lid on tight, and cover the lid with a tea towel, as my mother used to call them.  This is to catch any escaping liquid that might blow out of the blender.  Here's the deal; red chile will stain anything known to mankind.  And you really don't want to be trying to get a chile stain off the ceiling.  Or anything else.

                                                         Blend up your chile and the water and oregano.
                    
Once your chile is all blended up (and if it looks too thick, add more chile water)  pour it into a fine screened strainer over another bowl.  Take a big spoon and work it down over the strainer until you can't get any more to go through.  Some recipes don't tell you to do this,  they go straight to sauce after blending, but if you don't get the skin and seeds out, you will probably need some Pepcid later.  Just tellin' ya.

So now you've got a bowl of pure chile.  Isn't it beautiful?  Do you have a sweater or something you want to dye?

Alternatively, you can use a food mill, such as this trusty old stand-by.  It belonged to my Grandmother!


Anyway...

Take a pan and put a chunk of butter in there, say the size of a small egg.  Or you could use lard.  Yes, lard.  Then put in an equal amount of flour.  Then a pinch of comino or ground cumin.
I say a pinch because cumin is very powerful and I just like a tiny bit of it in my sauce.  You may want more, especially if you grew up in Arizona or eating Tex-Mex, which isn't the same as our Southern New Mexican food.  In my opinion, all that garlic and cumin just muddies up the taste, and possibly was needed where you didn't get good chile.  You want to taste the chile.

Let the cumin toast while the butter melts.  Then mix it all together and let the flour cook a bit.

Then pour your pure chile in there, be careful not to have your pan too hot.  We don't want spatters.
Now, this part is controversial.  Or  just personal preference.  But I think adding another liquid at this point is preferable, mainly because you need to stretch out your sauce a little.  I personally like to use chicken broth.  About the amount of a small can is enough.  My dear Auntie likes to put in tomato soup.  Lots of people want just water.   But I think chicken broth is best and it mellows the bitter bite of the chile just enough.

Also, now is the time for a half-dollar size amount of salt.   You will need to check the taste, though.  If you love chile, you might swoon.


Okay, so when the sauce has thickened to the point it coats a spoon, you're done.   That was easy, wasn't it?
Next installment:  Assembling the Enchiladas.